How to Install a Water Softener
If you've experienced issues with mineral deposits on your pipes, fixtures, and water spots on your dishes, your hard water is likely the culprit. Installing a water softener can eliminate these unsightly and damaging issues, preserve your faucets and sinks, and reduce the time you spend cleaning soap film from your shower. Before you rush out to get this magical unit for your home, learning how to install a water softener can give you some insight into what to expect when it's time to put one in.
Get your water softener installed today and see all the benefits that soft water can bring to your home.
Need Advice From a Professional on Your Water Softener Purchase and Placement?
Advantage Air Mechanical is here to help you choose the right water softener for your needs and ensure it's installed correctly. With over 30 years of experience serving the area, we offer fair prices and fast scheduling so you can enjoy the benefits of a water softener in your home today.
Choose the Right Location
Installing your water softener close to your main incoming water line before it reaches your water heater is best. Choose a location that won't expose the unit to extreme temperatures, and make sure the spot you choose offers access to an appropriate electrical outlet and a place to handle water drainage.
Turn Off the Water Supply
Use the main shutoff valve to turn off the water supply to your house. This can usually be found outside your house, where the main water line comes in. It could be on the wall of your home or located in a box buried partially into the ground. Valves in these recessed boxes often need a meter key to turn them off. This can be purchased at most hardware stores.
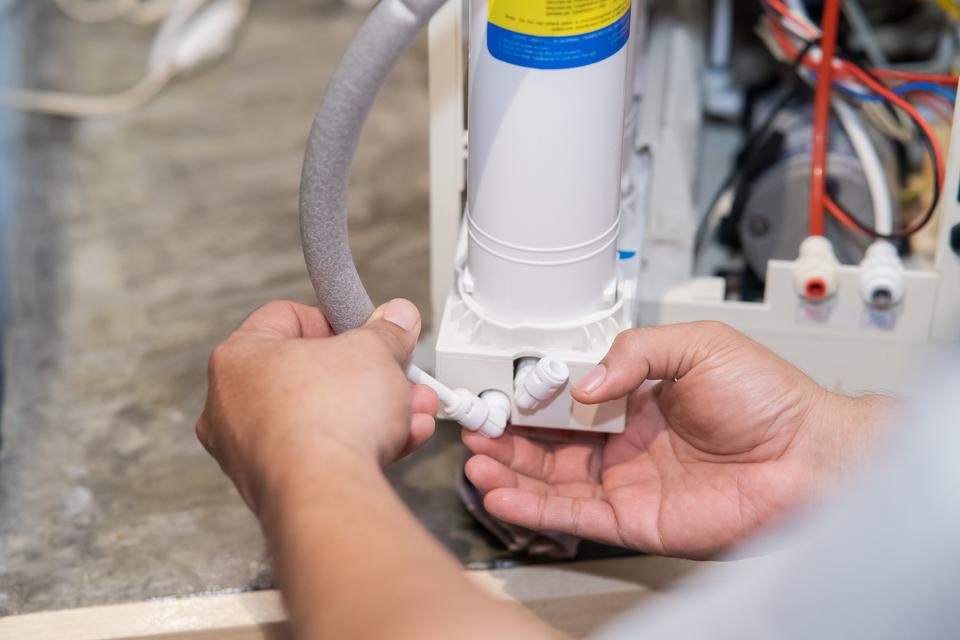
Install Bypass Valve, Inlet, and Outlet Pipes
The bypass valve comes with your water softener and allows you to use water that isn't filtered through the unit or divert water when your unit needs maintenance. You'll want to install this so that the valve connections are in line with your existing plumbing. Connect your inlet and outlet ports to the inlet and outlet pipe fittings you've measured and cut to create space for the water softener.
Connect the Drain Line and Overflow Line
Measure, cut, and assemble your drain line to drain water into a tub, drain, or sump pump. Do the same with the overflow line and ensure it is angled down since it uses gravity to run excess water away from the unit. Use the included clamps to secure the hose connections once they are in place.
Secure the Unit
Now that everything is in place, check that all your pipe and host connections are solid, and take the time to secure these things to your wall or floor so they don't shift over time.
Add Salt to the Brine Tank
Fill the brine tank with salt according to the manufacturer's instructions for your purchased unit. Take care not to go past the line included to prevent overfilling.
Start the Regeneration Process
Plug your water softener in and follow the instructions for your unit to start the regeneration process manually. This is often done with a red button located on the unit.
Check for Leaks
Turn on the cold water in the sink closest to your water softener and leave it open. Use the bypass valve to bypass the water softener, then turn on your main water supply slowly and let it run until there are no bubbles. Pull the bypass valve out to let water go through the softener, then cycle through hot and cold water in your sink. Check to see if there are any leaks around the unit. If not, your installation was a success!
Program the Control Valve
Use your water softener's instruction manual to program the control valve for your chosen unit. Set the time you want your unit to regenerate by replenishing the brine solution on the resin bed.
Want Your Water Softener Installed by an Expert?
Our knowledgeable and trustworthy plumbers at Advantage Air Mechanical have enough installations under their belts to easily handle your installation. Our team doesn't work on commission, so you won't have to worry about upselling, and our 100% satisfaction guarantee backs all our work.